- Launch the Shop!
- Finish making Aspen, my Wol dryad on a Doll Chateau body, and Shade, my dark starry art doll.
- Do lots more photoshoots. The Shop may kind of force me to do that.
-whip up a batch of petal pink dye and finally just gradient dye the tips of most of my dolls' fingers so their darn blushing will quit just wearing off the hands.
- Finish "Project Noggin" and get resin duplicates made. Probably by Haru Casting, they seem to be wonderful. It's a secret, you will see... Stay tuned!
-Give Lir, Donovan and Kitso the Hob their makeovers. Kevya too. My
dolls have been neglected and I want to give them better faceups and new hardcap wigs. Lir hasn't had work done since 2009!
-keep making tunics and shoes. lots and lots of shoes. Possibly dabble is a few fancy fullsets, props and furniture pieces, but the demand is for fantasy basics and shoes!
Showing posts with label sculpting. Show all posts
Showing posts with label sculpting. Show all posts
Wednesday, February 22, 2017

Saturday, January 2, 2016
Making Solas, part 2
Part 2,
Part 1 is here.
I am making a doll of a Dragon Age character called Solas, who is a bald elf male.
I am going to make the lovely but happily inexpensive Resinsoul/Bobobie Tang into this character.
The Plan:
First, facial mods. I need Tang to resemble Solas more closely. I'll be adding or refining his elf ears, and reshaping parts of his face.
Second, Aesthetics. I want to paint and blush him to look just like the art style of the games.
Third, Outfit. I'm going to make him his basic clothing from the game art, with a few accessories.
I ended up going out of order and doing a lot of the sewing first.
Then I did a ton of sculpting. See part 1.
So as of yesterday here is what he looked like.
We went from this:

To this:

And then today I scrubbed my fingers sore doing sanding work on this sculpt and polishing up the details. More pics and updates to come!
edit: UPDATE 1/10

I am now adding paint and blushing, using images from Dragon Age Inquisition to see how the actual animated figure was "skinned" with a digitally painted texture. I can copy the shading and colors. I was able to put his little brow scar in as an actual indentation- pretty proud of that. I will be adding more color and details later today, like his lip color, freckles, eyebrows and eyelashes, and so on.
 Here he is all shirtless and scrawny but looking more himself. I wish I
had better eyes for him to use but these were the only ones that fit.
They are the perfect color, just not the best fit.
Here he is all shirtless and scrawny but looking more himself. I wish I
had better eyes for him to use but these were the only ones that fit.
They are the perfect color, just not the best fit.
 He's judging me over having trouble trying to work out those stupid foot
wraps of his. He couldn't just wear boots like an ordinary fantasy
character, oooooh no.
He's judging me over having trouble trying to work out those stupid foot
wraps of his. He couldn't just wear boots like an ordinary fantasy
character, oooooh no.
Part 1 is here.
I am making a doll of a Dragon Age character called Solas, who is a bald elf male.
I am going to make the lovely but happily inexpensive Resinsoul/Bobobie Tang into this character.
The Plan:
First, facial mods. I need Tang to resemble Solas more closely. I'll be adding or refining his elf ears, and reshaping parts of his face.
Second, Aesthetics. I want to paint and blush him to look just like the art style of the games.
Third, Outfit. I'm going to make him his basic clothing from the game art, with a few accessories.
I ended up going out of order and doing a lot of the sewing first.
Then I did a ton of sculpting. See part 1.
So as of yesterday here is what he looked like.
We went from this:

To this:

And then today I scrubbed my fingers sore doing sanding work on this sculpt and polishing up the details. More pics and updates to come!
edit: UPDATE 1/10

I am now adding paint and blushing, using images from Dragon Age Inquisition to see how the actual animated figure was "skinned" with a digitally painted texture. I can copy the shading and colors. I was able to put his little brow scar in as an actual indentation- pretty proud of that. I will be adding more color and details later today, like his lip color, freckles, eyebrows and eyelashes, and so on.


Wednesday, September 30, 2015
Making Solas- Dragon Age doll.
I am making a doll of a Dragon Age character called Solas, who is a bald elf male.
I am going to make the lovely but happily inexpensive Resinsoul/Bobobie (? could be either honestly I could swear I've seen him on both websites' roster- they are sister companies) Tang into this character.
The Plan:
First, facial mods. I need Tang to resemble Solas more closely. I'll be adding or refining his elf ears, and reshaping parts of his face.
Second, Aesthetics. I want to paint and blush him to look just like the art style of the games.
Third, Outfit. I'm going to make him his basic clothing from the game art, with a few accessories.
***
I ended up going out of order because I am rather ill and not recovering in anything like decent time. *grump* So lying in bed I've had a lot of time for stitching things.
So first, parts of the Outfit!
I'm gonna make a basic outfit based on images from the Dragon Age games. (I should put a pic here of the outfit. Should. Don't have a decent one that isn't someone's cosplay.)
Solas' uber-nerd turtleneck ensemble has this green dickey-collar underlayer, which no one seems to know the true identity of. I am positing it could easily be some kind of vest thing.

So I made a kind of vest thing, out of greeny brown faux leather stuff I had.
I've left the back open and pretty untailored so that when the doll arrived I could fit it to him better.
Then I worked on the cream sweater thing itself.
 Here you see my messy lap-table drawing board, which I use when I craft
while sitting in bed. (You'd be amazed how often I have to do that. Er, I
can explain! I've been sick a lot the last few years, and have worked
out this method as a survival strategy for not going stark raving
bored.)
Here you see my messy lap-table drawing board, which I use when I craft
while sitting in bed. (You'd be amazed how often I have to do that. Er, I
can explain! I've been sick a lot the last few years, and have worked
out this method as a survival strategy for not going stark raving
bored.)

It has this collar edging which is unbelievably finicky to do at this scale.
I made the whole collar part as a separate piece that I then attached.
 Again the thing is open up the back so I can adjust it to fit around the
body when I have it in hand.
Again the thing is open up the back so I can adjust it to fit around the
body when I have it in hand.
Ta-da!

Then guess who decided to turn up today? I had to scramble to get decently dressed enough to get to the door before the mailman could walk away thinking I wasn't home. (Oh, like you sit sick all day in bed wearing a fully presentable outfit. Don't judge me.)
 The outfit needs a little work to fit him better, but not bad given that
I sewed it without him present. Definitely gonna take up those sleeves
for one thing.
The outfit needs a little work to fit him better, but not bad given that
I sewed it without him present. Definitely gonna take up those sleeves
for one thing.

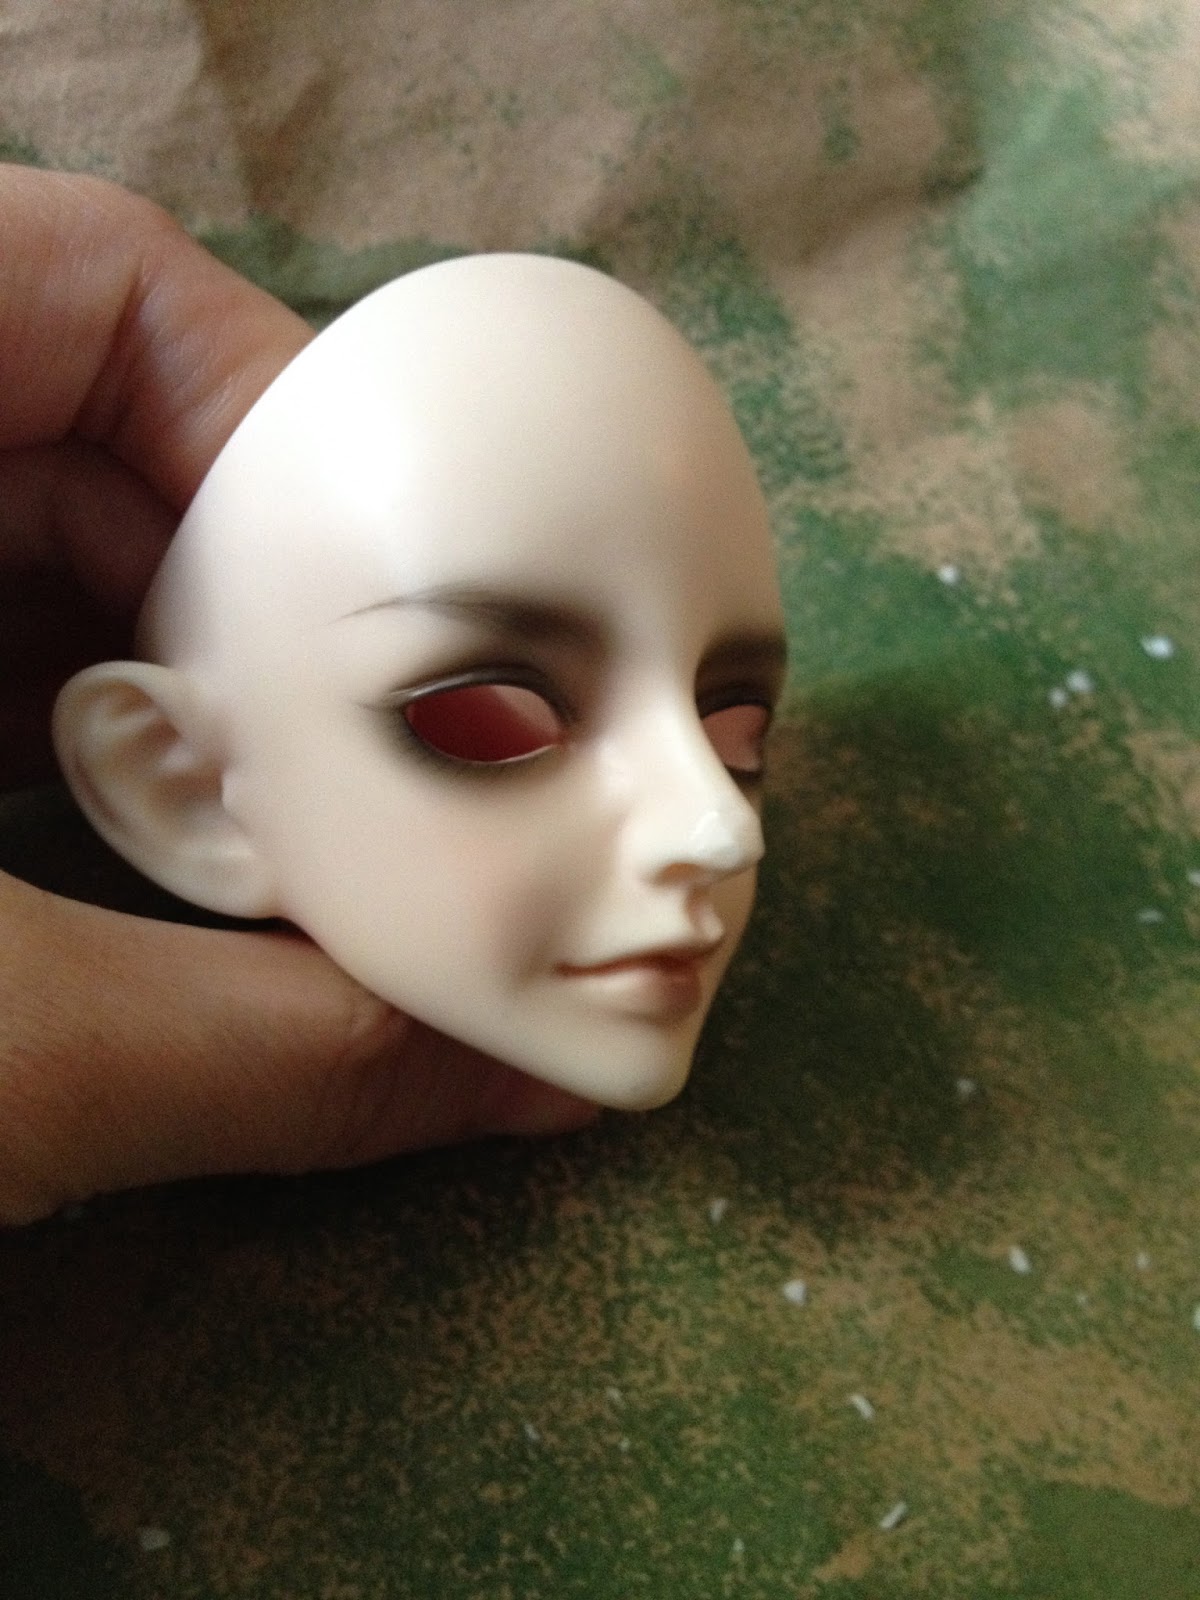
Oh that face. Uff. Not a strong resemblance at all. The eyes will need to be smaller, the jaw longer and wider, the ears modded.

I really, really wish RS/BBB would take a hint from other doll companies and show more than one highly-obscured-by-huge-wig shot of the doll's face. I had no idea his nose would be so slim and pointy, and he has an overbite like a looming tax audit.(it hangs overhead?) Welp, that's what the Dremel is for, after all.
The plan at the moment is to modify the heck out of his head, then spray paint it white and blush it back to matching. That took me two or three days last time I did it to a doll, because first the Apoxie modding has to cure before you sand and paint, and then the paint has to cure before you seal and and blush.
 I started on his nose first.
 Then I did some work giving him a jawline and filling up those giant eyes. It always looks awful when it's this rough.

 Then I started refining the work. Filling in the eyes will be tricky. I had to stop working because I am sick and my hands shake. I'm going to try doing a little more smoothing out today.
I am going to make the lovely but happily inexpensive Resinsoul/Bobobie (? could be either honestly I could swear I've seen him on both websites' roster- they are sister companies) Tang into this character.
The Plan:
First, facial mods. I need Tang to resemble Solas more closely. I'll be adding or refining his elf ears, and reshaping parts of his face.
Second, Aesthetics. I want to paint and blush him to look just like the art style of the games.
Third, Outfit. I'm going to make him his basic clothing from the game art, with a few accessories.
***
I ended up going out of order because I am rather ill and not recovering in anything like decent time. *grump* So lying in bed I've had a lot of time for stitching things.
So first, parts of the Outfit!
I'm gonna make a basic outfit based on images from the Dragon Age games. (I should put a pic here of the outfit. Should. Don't have a decent one that isn't someone's cosplay.)
Solas' uber-nerd turtleneck ensemble has this green dickey-collar underlayer, which no one seems to know the true identity of. I am positing it could easily be some kind of vest thing.

So I made a kind of vest thing, out of greeny brown faux leather stuff I had.
I've left the back open and pretty untailored so that when the doll arrived I could fit it to him better.
Then I worked on the cream sweater thing itself.


It has this collar edging which is unbelievably finicky to do at this scale.
I made the whole collar part as a separate piece that I then attached.

Ta-da!

Then guess who decided to turn up today? I had to scramble to get decently dressed enough to get to the door before the mailman could walk away thinking I wasn't home. (Oh, like you sit sick all day in bed wearing a fully presentable outfit. Don't judge me.)


Oh that face. Uff. Not a strong resemblance at all. The eyes will need to be smaller, the jaw longer and wider, the ears modded.

I really, really wish RS/BBB would take a hint from other doll companies and show more than one highly-obscured-by-huge-wig shot of the doll's face. I had no idea his nose would be so slim and pointy, and he has an overbite like a looming tax audit.(it hangs overhead?) Welp, that's what the Dremel is for, after all.
The plan at the moment is to modify the heck out of his head, then spray paint it white and blush it back to matching. That took me two or three days last time I did it to a doll, because first the Apoxie modding has to cure before you sand and paint, and then the paint has to cure before you seal and and blush.


Thursday, August 13, 2015
Cerra Canna Ceramic Knives- What and Why?

Cerra Canna ceramic knives are very different from an Exacto, in that besides being made of ceramic, they are incredibly hard to cut yourself with! Don't get me wrong, I love my Exacto knives but they do not harbor similar feelings for me or my thumbs. Owch. I love my ceramic knife set. The "blade" is really about as thick as a coin, and it's the cornery edge of that thick blade that is the actual scraping and carving edge. They come in a few shapes, and I'd recommend getting at least the one straight flat one.
I know it's $31.00 for a simple hand tool, but honestly, I'd hand over my Dremel before I gave up this little thingy right here.
When you carve with a ceramic knife, it's a lot like peeling a vegetable. You kind of scrape with it and smooth the little bevels each stroke causes, and it's a good way to remove mass without making too much flying dusty mess. You still have to wear a HEPA-rated mask and clean up your dust carefully, but it's way easier to clean up when it's not a fine powder all over everything in the room.
You don't have to be a serious drastic Modder to benefit from one of these, either. This scraping method of carving is very good for smoothing seams you intend to sand. (Shown Above) It can help you get the rough part of the seam off before you start smoothing it out and finishing it with high grit sandpaper.
Thursday, November 13, 2014
"I aten't Dead". Dolly Plans as they stand now.
So I've been off this blog while the school year kicks my butt. So much has happened this 2014 that it's hard to fit it all in. I will now attempt to anyway.
Personal news:
I have moved to a House, and my downtown art studio is being moved to my home. Now I'll have a room for dollies sewing and photography, and an outdoor studio for sculpting, modding, armoring, leatherwork, woodwork, casting, prop making and other messy pursuits. There will even be a ventilated Spray Booth for Safe Faceups in any weather! Right now I have the indoor Craft Room half set up, and it's been SO much easier to do things in there.
In June, I finally figured out what's been so wrong with my health, probably for years now. I am diagnosed Non-Celiac Gluten Intolerant. Making the change to eating totally Gluten Free has been a daunting, life altering shift ,and I've been taking it pretty hard, but I'll adjust eventually. I am trying to find a balance that will work for me, with ways to make vegetables my number one food pyramind base when I hate them so much. Uck.
Dolly News:
Some dolls have been let go, and some new faces have come along!
Sir Malcom, an Iplehouse SID hybrid from the Court group, and Fiachra, a Nobility doll hybrid, have both been sold on. Their characters are not fleshed out enough to justify me keeping such a huge bulk of costly resin around.
I posted my work on Moira, my new FL Minifee Mirwen mod, earlier this year.
I have also acquired a longtime Grail dream, a ResinSoul Ju head on a Soom Adamelli/Shale body with clear "crystal" hooves.
 Isn't she darling? I made her a wig after a few false tries. Somehow the braids kinda make it. I've always loved the Ju sculpt. I had to blush her to match her snowy RS resin to Soom's ivory, so I hope her head will mellow out soon and make that color match a bit easier. Maybe I can put her head under a UV lamp to hurry it along. I've done that with other resin- doesn't harm it a bit.

Dolly Plans:

Personal news:
I have moved to a House, and my downtown art studio is being moved to my home. Now I'll have a room for dollies sewing and photography, and an outdoor studio for sculpting, modding, armoring, leatherwork, woodwork, casting, prop making and other messy pursuits. There will even be a ventilated Spray Booth for Safe Faceups in any weather! Right now I have the indoor Craft Room half set up, and it's been SO much easier to do things in there.
In June, I finally figured out what's been so wrong with my health, probably for years now. I am diagnosed Non-Celiac Gluten Intolerant. Making the change to eating totally Gluten Free has been a daunting, life altering shift ,and I've been taking it pretty hard, but I'll adjust eventually. I am trying to find a balance that will work for me, with ways to make vegetables my number one food pyramind base when I hate them so much. Uck.
Dolly News:
Some dolls have been let go, and some new faces have come along!
Sir Malcom, an Iplehouse SID hybrid from the Court group, and Fiachra, a Nobility doll hybrid, have both been sold on. Their characters are not fleshed out enough to justify me keeping such a huge bulk of costly resin around.
I posted my work on Moira, my new FL Minifee Mirwen mod, earlier this year.
I have also acquired a longtime Grail dream, a ResinSoul Ju head on a Soom Adamelli/Shale body with clear "crystal" hooves.


This is Jules! He and his gal-pal Freckles have come to live with me! They are sharing a Pukifee body. I finally have every body size of FL tinies, so I can craft reliably for each of them! Jules is a Juri '11 Multihead, and Freckles is a Zio Multihead faceplate set (Not shown, obv.)
Dolly Plans:

Remember this guy? Aneirin is my Dollshe Saint frankendolly mod, and I am so excited about finishing my outdoor Studio because I will finally get to really get busy with sculpting and modding in a work environment designed for that! I want to finish Aneirin so badly. He and a few other half done mods that really needed the right facilities will finally get my attention.
Sculpting!
All I can say is those of you who have been wishing there were more >Size 0-2 dolls available out there... Well, start saving your pennies because I have planz.
Things the doll hobby does not have much of: Dress size 14-16 Ladies, in SD or MSD size. Men who have any body fat whatsoever- I don't mean obese, I mean not-shredded or lean. Mature faces. Mature MSD faces. All in skintones from white to pink to tan to black, heads separately available from bodies, multiple hand options, multiple bust options, possibly even multiple limb options.
If those things interest you, watch this blog.
If, on the other hand, you are a recaster (thief) or recast supporter (buyer from thieves), get lost. You are not welcome here until you quit giving thieves money for stealing.
Thursday, August 29, 2013
Aneirin - Saint to Monster, Part IV
(This post and the links below are likely to contain Anatomically Correct Doll Nudity- NSFW or for especially shy people)
This is part 4 of an ongoing project.
See Part 3
See Part 2
See Part 1
I've picked up with this project again, so there'll be more added to this post over the next few weeks as I update.
 I got the right paints to go over my modifications, and I've been sanding the mod work carefully, so this evening I put on my mask and did some spraying. The grey is a surprisingly close shade to match the grey resin. Blushing will even it out. The off-white is called Racing White, but it seems to have gone on sort of... glossy, so I'll be trying another lighter coat later. I've also been doing some adding bulk to the thigh parts.
Update, Oct 20
Here's a shot of the built up thighs, in the rough stages:

This is part 4 of an ongoing project.
See Part 3
See Part 2
See Part 1
I've picked up with this project again, so there'll be more added to this post over the next few weeks as I update.

Update, Oct 20
Here's a shot of the built up thighs, in the rough stages:

Friday, August 2, 2013
Aneirin- Saint to Monster: Part III
As of April 2013 (just posting this here now!)
This is part III of an ongoing project.
See Part II.
See Part I.
Post contains Anatomically Correct Doll Nudity
Been working on Aneirin's wig. Felt cap, fancy yarn, hand-stitched a loop at a time to the cap. Certain yarns give the effect of messy dredlocks.


Practice shots with those ears of his...

I also worked on adding some better locks to his joints so that he'll be able to stand unaided. Balance is pretty tricky on them big ol' legs.


I built these ridges on the fronts of the hip parts to stop him pitching forward when he's standing. They will get sanded and smoothed like the rest of everything I've modded.
I obtained Soom wrist parts for long fingered Soom hands! He won't be using his default Little Monica hands that came from that company with his body. They're cute, but hardly right for him.


Advance to Part 4!
Sunday, July 14, 2013
Making Schatzi, part 1
Schatzi, a Dachshund BJD
I am still working on several other things in the Eternal Rotation, and they will make their blog appearances as I work on them,
but this is yet another project because I wanted to try making an animal BJD before I do more work on my humanoid BJD sculpting. BJDs need pets, and Schatzi here will be the size of a Miniature Dachshund to the 1/3 or SD dolls, and a Standard Dachshund to the 1/4 or MSD dolls. If he works out well, I want to try a Corgi, too. I don't know how long it will be before I am good enough at this to make a house cat, though, so don't hold your collective breaths for that development. :sweat

I started with a good plan, and some notes on joint types. A stubby wee dog will be basically ALL joints, with very few major straight parts like humans have with their long limbs. The hardest part will be the hind legs, because I want it to be able to sit properly.

I'm working on this one in polymer clay first, which has its pros and cons, but they're pros and cons I know well, since I've been working with the stuff for over a decade now. I sculpt, then bake lightly, then add more, then rebake. Eventually I'll do a home junk cast in resin and refine that rough cast with Apoxie Sculpt. The end goal here is to have something nice enough to cast multiples of in resin.
I made a body tube shape and then cut it into segments, and it looks pretty miserable for the first rough stages. My HS art teacher used to call this the Butt-Ugly Stage, and every project goes through it, so it doesn't make me panic.
 I worked the body into socketing segments, and made a paw and some leg sections.
 That one paw got duplicated by push-mold, saving me some work in making four different paws. I did have to refine all four paws, of course, but it was a good way to get them all the right size. I also made a headback, and that masky thing there is the rough base for a faceplate.
 Neck with headback perched on it. I tried a segmented neck but it looked like a stubby diplodocus... so we're going with a mostly straight neck, with a cup base for mobility. This has been rough sanded for symmetry and shape so far.
 The body wasn't long enough compared to the legs and neck, so I added another segment. I also added foreleg/shoulder holes, roughed in.
 Progress pic- The body segments and neck, headback, leg and paw, just to check proportions. There's the rough faceplate too!
 Without the eyes as more than big sockets, he looks like Zero from Nightmare Before Christmas. But he's coming along.
My sister's family has a Dachshund so I'm pretty familiar with their pointy wee faces and little arched noses.
Testing the shapes!
 Sitting up. His legs didn't stay this long, because this test stringing showed me they weren't the right length compared to his body. Finally he begins to look like a dog! I tried a segmented tail, but stringing it turned out to be too fiddly, so this is the only pic it shows up in. Shame, because it was so nicely mobile.
Much refining later:
 Dogbutt. Here's the one piece tail, and it rotates in its socket quite nicely so he can wag or slink, as the mood takes him.
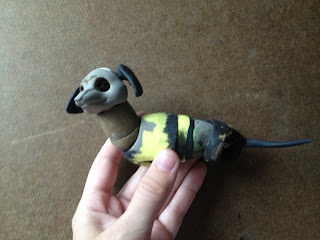 This is a bad shot, sorry, but I've fixed his body joints to be much, MUCH smoother and closer fitted. Symmetry is the hardest part, I think, and he's almost at 50% done. He begins to show the shapes the final sculpt will have.

His little ears turn in their sockets too. The faceplate is nearly done, but I need to work out his eyes so they can stop being big old holes in his face.
More to come!
I am still working on several other things in the Eternal Rotation, and they will make their blog appearances as I work on them,
but this is yet another project because I wanted to try making an animal BJD before I do more work on my humanoid BJD sculpting. BJDs need pets, and Schatzi here will be the size of a Miniature Dachshund to the 1/3 or SD dolls, and a Standard Dachshund to the 1/4 or MSD dolls. If he works out well, I want to try a Corgi, too. I don't know how long it will be before I am good enough at this to make a house cat, though, so don't hold your collective breaths for that development. :sweat

I started with a good plan, and some notes on joint types. A stubby wee dog will be basically ALL joints, with very few major straight parts like humans have with their long limbs. The hardest part will be the hind legs, because I want it to be able to sit properly.

I'm working on this one in polymer clay first, which has its pros and cons, but they're pros and cons I know well, since I've been working with the stuff for over a decade now. I sculpt, then bake lightly, then add more, then rebake. Eventually I'll do a home junk cast in resin and refine that rough cast with Apoxie Sculpt. The end goal here is to have something nice enough to cast multiples of in resin.
I made a body tube shape and then cut it into segments, and it looks pretty miserable for the first rough stages. My HS art teacher used to call this the Butt-Ugly Stage, and every project goes through it, so it doesn't make me panic.


My sister's family has a Dachshund so I'm pretty familiar with their pointy wee faces and little arched noses.
Testing the shapes!

Much refining later:


His little ears turn in their sockets too. The faceplate is nearly done, but I need to work out his eyes so they can stop being big old holes in his face.
More to come!
Friday, February 15, 2013
Aneirin- Saint to Monster, Part II
This is Part II of an ongoing Mod Project.
See Part I
Update! 4/12
Had a stressful month so far, and having this project to work on is good therapy.

Here's an example of the progress on the ears. They start out rough (Left) but I can get them to look smoothly sculpted by sanding them (Right). Later they'll get smoothed even more.
To get the proportions I want, I am shortening the calf section of the legs by a considerable amount.

Each leg piece gets a section cut out of it in the middle.

I am saving the original socket so that it will still fit on top of the foot part. I've joined the pieces back together after taking that middle section out.

The joined sections have to be smoothed out inside so that stringing won't get caught on it.
Then the outside of the joined parts have to be smoothed over too.

I tinted some white Apoxie Sculpt with acrylic paint to get it roughly the shade of the grey resin. That'll make it much easier to blush over and smooth into a nice finish later. (The top one hasn't had Apoxie yet, the bottom one shown has) The Apoxie cements the joined bits and makes them look like they're supposed to be this shape and size. Once it cures, I'll be able to sand it so that it looks much better.
Work also progresses slowly on the knee joints, but there's nothing much worth photographing just yet.
More later!
Update, 2/13

Today I drilled the holes into the headback for magnets and glued them in. They may get a very thin layer of Apoxie and then paint over them.

I'm also still refining the ears, but they got drilled for magnets today too.

I've been sanding and cleaning up the reconstructed legs and still working on the knees. The thighs also need added bulk next.
Update 2/15
I did a test stringing today. It might be a while before I am able to work on him, or it might not, but before I get much further I needed to see how his weight sit on his joints.

Good thing I did, too, because he still can't stand by himself yet. I think some adjustments and tighter stringing will fix the problems easily though. He's starting to look like himself.

He can do the Soom Crouching Pose at least. He's a long way from done but he's showing promise at last.
More in Part III.
See Part I
Update! 4/12
Had a stressful month so far, and having this project to work on is good therapy.

Here's an example of the progress on the ears. They start out rough (Left) but I can get them to look smoothly sculpted by sanding them (Right). Later they'll get smoothed even more.
To get the proportions I want, I am shortening the calf section of the legs by a considerable amount.

Each leg piece gets a section cut out of it in the middle.

I am saving the original socket so that it will still fit on top of the foot part. I've joined the pieces back together after taking that middle section out.

The joined sections have to be smoothed out inside so that stringing won't get caught on it.
Then the outside of the joined parts have to be smoothed over too.

I tinted some white Apoxie Sculpt with acrylic paint to get it roughly the shade of the grey resin. That'll make it much easier to blush over and smooth into a nice finish later. (The top one hasn't had Apoxie yet, the bottom one shown has) The Apoxie cements the joined bits and makes them look like they're supposed to be this shape and size. Once it cures, I'll be able to sand it so that it looks much better.
Work also progresses slowly on the knee joints, but there's nothing much worth photographing just yet.
More later!
Update, 2/13

Today I drilled the holes into the headback for magnets and glued them in. They may get a very thin layer of Apoxie and then paint over them.

I'm also still refining the ears, but they got drilled for magnets today too.

I've been sanding and cleaning up the reconstructed legs and still working on the knees. The thighs also need added bulk next.
Update 2/15
I did a test stringing today. It might be a while before I am able to work on him, or it might not, but before I get much further I needed to see how his weight sit on his joints.

Good thing I did, too, because he still can't stand by himself yet. I think some adjustments and tighter stringing will fix the problems easily though. He's starting to look like himself.

He can do the Soom Crouching Pose at least. He's a long way from done but he's showing promise at last.
More in Part III.
Subscribe to:
Posts (Atom)