Showing posts with label modding. Show all posts

Friday, August 20, 2021

Restoration: a Rose of Venice, part 1, the Cleanup


I am nicknaming this restoration project doll Rose, and she's had a journey.

I found her on the Bay of E, and other doll collectors had pointed out the lower price of the listing but no one was sure if she was legitimate. Being 'older' in the hobby than some, I recognized that this doll is an older sculpt from back in 2008-2010 style, when recasts weren't such a terrible problem like they are now. So I gambled on her being legit and my own instincts being correct, snagged the sale and got her to my house. 

Detective work ensued! It too AGES to find her original provenance, but she had marks inside the head that helped. The body was just such an older style it was hard to find. She was an Asleep Eidolon Yara, and was probably made in 2009 or 10! Besides some cosmetic stuff, she was in great shape, no major dents or cracks.

She was clearly someone's special girl, and was very well loved. Don't worry, Rose, we'll have you feeling just as loved again soon!

One other way I found her source company was because her factory faceup was still there, I think, especially those eyebrows. She'd been decorated by whoever used to have her, but some of it was glittery nail polish, which can damage resin sometimes. But as it flaked off, the resin beneath showed no damage! With a wig and a dress we can see she's really quite sweet, she just needs some new faceup and blushwork.

 
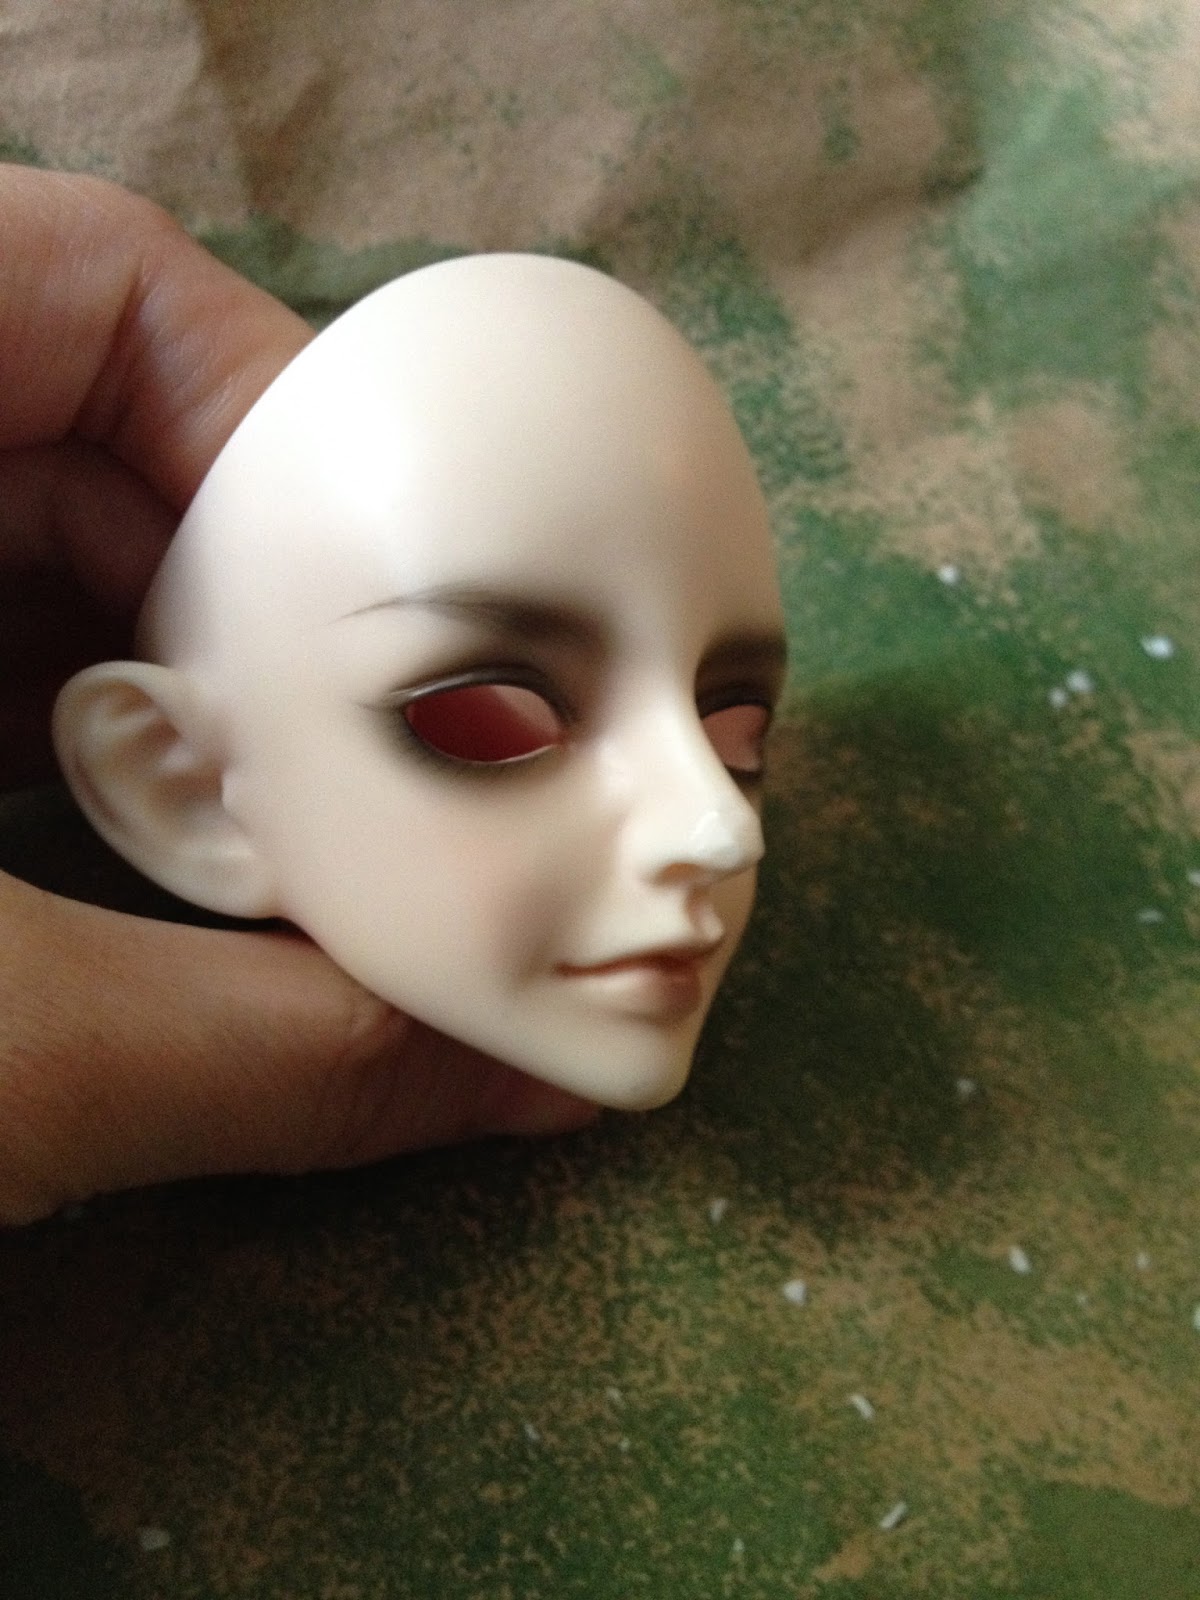
Here's her face all scrubbed blank and clean. I even did a little sanding to a level to remove some of her yellowing as well. Her mouth, under the nail polish, was undamaged. She's even got little teefs visible.


Here she is in all her scrubbed clean glory! She is gently yellowed, and I might restore the pinks faded out from her resin with a light dye bath, or just with how I blush her.


Tuesday, August 22, 2017

Making Aspen the Dryad, part 2

This is a kind of post-dated post. A lot's been happening in my life and I've gone Pro as an artist so things have been rather hectic for 2017! But I did finish Aspen and she's such fun to play with!
Here's how it went.

After my thumb healed I was able to finally do her blushing. I went for a very simple and dramatic faceup, with greys and browns. He skin has been painted and blushed, with those little marks on it that birches and aspens get. I made those dimensional by using a little grainy acrylic texturing gel.


Then it was just a question of popping her wig on... and she was done! She's a ton of fun to photograph and her body takes some getting used to in the posing department but I love her expression.

I probably won't bother making clothes for her. Trees don't wear clothes! With Autumn coming up, I will need to finish her other wig- the golden Aspen in full glory!

Wednesday, April 5, 2017

Native Pair Project

Okay so I bought new dolls... but they're not for me! Not really anyway. I may end up long-term loaning them as an exhibit to our tribal culture museum.

This is a project I've meant to do for a long time but I've put off because I couldn't find anything realistic enough at a nice price and a small size. I've put down money on an AncientTales pair of male and female 1/6 scale mature dolls. I am going to modify and use them for diorama photos of my native tribe's history.

I am very excited to finally do this, later this year. I can make photos into illustrations for books if they're good enough.

Thursday, March 9, 2017

Making Aspen the Dryad, part I

So I've wanted for ages to make one of the weird super-slim alien jointed bodies sold by Doll Chateau into a Dryad. I found the perfect body for this, the K-08 male, and while it is 52cm with a head on, in scale it counts as Mini sized. She'll just be awfully tall for a 1/4 doll.


I chose the boy version of that body for this project because the girl body has huge hips and almost no ribcage ....and i know it's weird but just looking at its frail and tiny torso makes it hard for me to breathe- it's a personal anatomy nitpick/phobia/involuntary reaction I can't get around. So I bought a boy doll and will be making it into a girl who could plausibly have organs and inhale or exhale.

Then I just needed to find a head. I wanted it to be more than just another pretty face. The right face for my dryad would need to be something special, striking, otherworldly. Armeleia of Seed Doll/Seed Arts made this little bird faced head called Wol, and I knew she'd be perfect. I snagged one as soon as the order went up.

In the months before Wol arrived, I spent a lot of time working out how I would make her into a dryad. I knew I wanted a very special kind of wig, not just a green hair wig. I wanted to give her leaves, and do four or more wigs that I could change seasonally to take her outside for photoshoots. I settled on hand dyeing a LOT of fringey lace.


So much lace. So much hand dyeing. Partly I used Dye-Na-Flow by Jacquard, and partly just fabric markers for the brown twiggy bits. Each piece of lace was laid out flat, then painted and marker'ed one.
strand.
 at a time.  ....Yikes. Sometimes I wonder about myself and my idea of fun.


 Then it was time to work on the body mods. I shaved off the boy bits on the hip piece, which was easy, but the chest was a little trickier. I wanted her to have some small breasts, so I had to sculpt some in. Luckily this body has wide, low, long pecs so there's plenty of room. Here's the first few cuts with the ceramic scraper knife, and you can see my pencil guidelines. Nothing too extreme, just an A-cup size.


 Making things symmetrical before I refine the shapes. A certain amount of symmetry is desired here.


 Then a LOT of sanding! So often the key to a good mod vs a kind of shoddy one is the amount of time you're willing to put in with the sandpaper and descending fineness of grits to get a good smooth finish.
 Even at this stage she's not quite done. I hurt my thumb with an S-Hook at this point, (you do NOT want to know, it was pretty bad) so sanding had to stop while my poor digit recovered. 
Luckily Wol arrived to distract me!


 Here she is! And with her genius little s-hook holder made in the shape of a cluster of crystals! It's super sparkly in person. Armeleia hand cast it herself to include the glittery bits, so unless a bigger company wants to go to that kind of trouble they might not steal the concept. (fingers crossed. it's such a nice detail) Wol herself was in a cute little printed cloth bag I will be keeping.

I spent some time with my bandaged thumb and engaged in an evening of wigmaking. I'm pretty pleased with the results.

 Here she is, starting to come together! I am so excited! Her eyes are some I'd already owned and used on a doll I had sold on, and I was hoping they'd work for her. I love her look!


What you're seeing here on the blog is the Summer Wig, but she'll have other seasons too. From similar lace I've made her an Autumn wig in full Aspen Gold. I want to make a Spring wig with budding leaves and flowers, and a Winter wig full of ice crystals and dusted with snow.

I plan to blush her like an Aspen Tree, with lots of little black bark texture marks, and greyish brown shading and faceup.

Wednesday, February 22, 2017

Dolly GOALS for 2017

- Launch the Shop!

- Finish making Aspen, my Wol dryad on a Doll Chateau body, and Shade, my dark starry art doll.

- Do lots more photoshoots. The Shop may kind of force me to do that.

-whip up a batch of petal pink dye and finally just gradient dye the tips of most of my dolls' fingers so their darn blushing will quit just wearing off the hands.

- Finish  "Project Noggin" and get resin duplicates made. Probably by Haru Casting, they seem to be wonderful.  It's a secret, you will see... Stay tuned!

-Give Lir, Donovan and Kitso the Hob their makeovers. Kevya too. My dolls have been neglected and I want to give them better faceups and new hardcap wigs. Lir hasn't had work done since 2009!

-keep making tunics and shoes. lots and lots of shoes. Possibly dabble is a few fancy fullsets, props and furniture pieces, but the demand is for fantasy basics and shoes!

Sunday, January 3, 2016

PSA- why you NEED a proper respirator when spraying Sealants or paints.

Dear friends, Let me show you guys why respirators are VITAL no matter what you are spraying.

I have a shop where I do my spraying work. It has a filter and a fan that sucks the air out of the spray chamber, filtering as it goes.


This is a few sprays of a paint onto some doll parts. You see that square in the wall? That is the filter. It was white when I started this. That is what was pulled out of the air while I sprayed, the can was never aimed at the filter. 

That's what ends up in your lungs when you inhale aerosols. it just shows up here because I was using a paint which has a strong color.

Please, PLEASE use a properly fitted and rated respirator. You only get one set of lungs.

Saturday, January 2, 2016

Making Solas, part 2

Part 2,
Part 1 is here.

I am making a doll of a Dragon Age character called Solas, who is a bald elf male.
I am going to make the lovely but happily inexpensive Resinsoul/Bobobie Tang into this character.

The Plan:

First, facial mods. I need Tang to resemble Solas more closely. I'll be adding or refining his elf ears, and reshaping parts of his face.

Second, Aesthetics. I want to paint and blush him to look just like the art style of the games.

Third, Outfit. I'm going to make him his basic clothing from the game art, with a few accessories.

I ended up going out of order and doing a lot of the sewing first.
Then I did a ton of sculpting. See part 1.

So as of yesterday here is what he looked like.
We went from this:

To this:

And then today I scrubbed my fingers sore doing sanding work on this sculpt and polishing up the details. More pics and updates to come!

edit: UPDATE 1/10


I am now adding paint and blushing, using images from Dragon Age Inquisition to see how the actual animated figure was "skinned" with a digitally painted texture. I can copy the shading and colors. I was able to put his little brow scar in as an actual indentation- pretty proud of that. I will be adding more color and details later today, like his lip color, freckles, eyebrows and eyelashes, and so on.

 Here he is all shirtless and scrawny but looking more himself. I wish I had better eyes for him to use but these were the only ones that fit. They are the perfect color, just not the best fit.


 He's judging me over having trouble trying to work out those stupid foot wraps of his. He couldn't just wear boots like an ordinary fantasy character, oooooh no.

Wednesday, September 30, 2015

Making Solas- Dragon Age doll.

I am making a doll of a Dragon Age character called Solas, who is a bald elf male.
I am going to make the lovely but happily inexpensive Resinsoul/Bobobie (? could be either honestly I could swear I've seen him on both websites' roster- they are sister companies) Tang into this character.

The Plan:

First, facial mods. I need Tang to resemble Solas more closely. I'll be adding or refining his elf ears, and reshaping parts of his face.

Second, Aesthetics. I want to paint and blush him to look just like the art style of the games.

Third, Outfit. I'm going to make him his basic clothing from the game art, with a few accessories.

***

I ended up going out of order because I am rather ill and not recovering in anything like decent time. *grump* So lying in bed I've had a lot of time for stitching things.

So first, parts of the Outfit!


I'm gonna make a basic outfit based on images from the Dragon Age games. (I should put a pic here of the outfit. Should. Don't have a decent one that isn't someone's cosplay.)

Solas' uber-nerd turtleneck ensemble has this green dickey-collar underlayer, which no one seems to know the true identity of. I am positing it could easily be some kind of vest thing.


So I made a kind of vest thing, out of greeny brown faux leather stuff I had.

I've left the back open and pretty untailored so that when the doll arrived I could fit it to him better.

Then I worked on the cream sweater thing itself.

Here you see my messy lap-table drawing board, which I use when I craft while sitting in bed. (You'd be amazed how often I have to do that. Er, I can explain! I've been sick a lot the last few years, and have worked out this method as a survival strategy for not going stark raving bored.)


It has this collar edging which is unbelievably finicky to do at this scale.

I made the whole collar part as a separate piece that I then attached.

Again the thing is open up the back so I can adjust it to fit around the body when I have it in hand.


Ta-da!


Then guess who decided to turn up today? I had to scramble to get decently dressed enough to get to the door before the mailman could walk away thinking I wasn't home. (Oh, like you sit sick all day in bed wearing a fully presentable outfit. Don't judge me.)


The outfit needs a little work to fit him better, but not bad given that I sewed it without him present. Definitely gonna take up those sleeves for one thing.


Oh that face. Uff. Not a strong resemblance at all. The eyes will need to be smaller, the jaw longer and wider, the ears modded.


I really, really wish RS/BBB would take a hint from other doll companies and show more than one highly-obscured-by-huge-wig shot of the doll's face. I had no idea his nose would be so slim and pointy, and he has an overbite like a looming tax audit.(it hangs overhead?) Welp, that's what the Dremel is for, after all.

The plan at the moment is to modify the heck out of his head, then spray paint it white and blush it back to matching. That took me two or three days last time I did it to a doll, because first the Apoxie modding has to cure before you sand and paint, and then the paint has to cure before you seal and and blush.


 I started on his nose first.

 Then I did some work giving him a jawline and filling up those giant eyes. It always looks awful when it's this rough.


Then I started refining  the work. Filling in the eyes will be tricky. I had to stop working because I am sick and my hands shake. I'm going to try doing a little more smoothing out today.
 

Sunday, September 13, 2015

Aneirin- Saint to Monster, part VI

This is part 6 of a series.  (Other posts may contain Anatomically Correct Doll Nudity.)
Part 5
Part 4
Part 3
Part 2
Part 1

Well, it's been a long haul, and the most intensive modification I've ever done, but he's pretty much finished.


 I went back and did more contouring to his faceup, and an absurd number of coats of Tamiya spray enamel to the lengthening mod I did on his neck. He has two pairs of ears so far, the Shy/Sad/Sleepy ears, shown above, and his regular Upright ears. I mean to make a few more pairs, but those will be further projects. These are his minimum needed ears. (not a phrase I ever anticipated typing...)


 Here is his full body glory! (but this was before I added color to his nipples. Oops.) I may be adding more color to his claws on his feet, since they don't photograph like I blushed them. He does stand on his own pretty well.


Here he is all finished up and wearing his little raggedy kilt wrap. People on Den of Angels commented that he looks confused about being indoors. he does look quite baffled by walls and carpet, when his preferred home is a forest. I can't wait to get him outdoors for some photoshoots.

Thanks for following along! I really appreciate everyone who's been following this whole long escapade! 

Thursday, August 13, 2015

Cerra Canna Ceramic Knives- What and Why?

What is a Cerra Canna ceramic knife, and why would a modder want it? Is it like an Exacto or sharp craft knife?


Cerra Canna ceramic knives are very different from an Exacto, in that besides being made of ceramic, they are incredibly hard to cut yourself with! Don't get me wrong, I love my Exacto knives but they do not harbor similar feelings for me or my thumbs. Owch. I love my ceramic knife set. The "blade" is really about as thick as a coin, and it's the cornery edge of that thick blade that is the actual scraping and carving edge. They come in a few shapes, and I'd recommend getting at least the one straight flat one.

I know it's $31.00 for a simple hand tool, but honestly, I'd hand over my Dremel before I gave up this little thingy right here.

When you carve with a ceramic knife, it's a lot like peeling a vegetable. You kind of scrape with it and smooth the little bevels each stroke causes, and it's a good way to remove mass without making too much flying dusty mess. You still have to wear a HEPA-rated mask and clean up your dust carefully, but it's way easier to clean up when it's not a fine powder all over everything in the room.

You don't have to be a serious drastic Modder to benefit from one of these, either. This scraping method of carving is very good for smoothing seams you intend to sand. (Shown Above) It can help you get the rough part of the seam off before you start smoothing it out and finishing it with high grit sandpaper.